Thursday, 27 September 2012

Fixing A Hole, remember the song?

I'm fixing a hole where the rain comes in ..............; remember that Beatles song. I couldn't help thinking of the lyrics when I saw this view of Torquay harbour, after an evening meal. the light was just fading and the crane jib seemed to be reaching up to the clouds. well I thought so .........


Of course I took many more photos whilst there on a holiday a few days ago. More of these in a future post. I am still trying to catch up with many, many e-mails but thought this was a gas.

Saturday, 8 September 2012

Photographs From My Garden

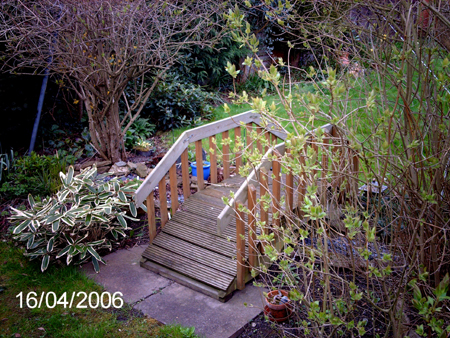
Over the years I have taken so many photographs of my garden, That I decided to bring some of them together and create a virtual tour which I could post to the internet.

Sorting them out was a difficult task, should I pick my favourites (possibly) or those I felt may interest other people. Should I include lots of images or be selective. I would not want to bore the pants off people. In the end, I picked a few to show the overall structure of the garden and one or two of the individual flowers and plants.


If you would like to see more  then pop on across to my Squidoo Lens, Welcome To My Garden. This was awarded a purple star from Squidoo HQ, the sites top award for its lenses (web pages), an outcome I found very pleasing.

This gave me the courage to follow it up with another lens of photographs taken in my garden. This time I included photos of ten of my favourite red flowering plants and shrubs. Again I was awarded with a purple star. Both lenses were also featured on the home page when first published. If you would like to check out the ssecond lens you can find it at, Ten Favourite Red Flowers For Your Garden.


Please do try to find time to visit my garden, always great to show people around on this virtual tour.

Sunday, 26 August 2012

More trials with Photoshop

This time I have been experimenting with a few edits which will allow me to improve on my poor photographic skills - and my impatience when taking photographs.


This image is of the house at Lites - Carey Manor near Yeovil. Not a very sunny day - note the sky! What sky you might say? Well it is there but grey cloud covering the whole sky. We did get some good weather on this trip, so the first task was to find a photo with a decent blue sky with some interesting clouds if possible.


This shot of Glaston bury the following day looked very promising... So now I have a photo without a sky, and a photo of a sky. Will they match?

The following steps were taken to put the two together:-


  1. Select the sky in the first image with the magic wand (a single click since all the sky is the same colour). Now from the select menu choose INVERT.
  2. Copy the image except the sky and paste into a new image.
  3. Select a rectangle from the sky in the second image; copy this selection and paste as a new layer into the new image from the last step.
  4. Select the new layer and then choose from the edit menu, TRANSFORM. Select SCALE
  5. Expand the sky image until it fits behind the buildings without the background showing.
  6. I was not finished yet.
  7. First of all, for good measure, I flipped the image horizontally (Image/Rotate Image)
  8. I then wanted to make sure the chimney was vertical. So I rotated the image in one or two steps to achieve this.
  9. Now the roofline of the adjoining chapel was wrong.
  10. I selected the whole of the chapel with the magnetic lassoo tool. Again, using the transform function I rotated the chapel to achieve a horizonta roofline.
  11. This left gaps with the background showing thru around the chapel. These were filled in with the clone stamp tool.
And the resulting image:-


Mmmm, I may have overcompensated for the angle of the chimney, but otherwise I have learnt a few tips and the image is considerably better. Don't you think?


Friday, 17 August 2012

Removing unwanted artefacts in a photo, using Photoshop

Ever taken a photograph and decide it was a real winner; before noticing that small object which you hadn't seen in the camea's screen (we'er talking digital obviously) before pressing the button. I know I have many with which I wanted to illustrate articles, etc.

What is wrong with these:-


Answer:- The people just coming into view through the entry


Answer:- The visa card advert.


Answer:- The power lines running across the tower.


Answer:- The small lamp in the lower left corner.


Answer:- The wheelbarrow, how could I have missed it?
There were even gardeners working there at the time.

Most of these issues I solved using the CLONE STAMP TOOL in Photoshop. A very useful editing tool if used carefully. I have recently written a tutorial on Squidoo, which shows how I used this to clean up the examples shown above. You can find it at:-


You can also see the results of the editing process, a set of much better and more appropriate photographs which I can feel proud of. The only one that I didn't edit by this method was the first. There was no background to speak of that I could have cloned to remove the figures. In that case I selected the open at the end of the entry and deletd it. I then added a second layer beneath the original photograph and adjusted its position to give a pleasing result. I had to carefully select a suitable street shot and re-size it to look natural in the edited photograph. But no problems really. I will include a link to this edit, asap.

Sunday, 5 August 2012

Colours in a black and white photo

I love that effect where you see a single colour in a black and white photograph. I saw an example again yesterday and decided it was time to learn how to achieve it.

I used Photoshop to manipulate the image. I don't think I could do it with my free version of Photoplus (V8) but if you know different please let me know.

After a few dead end experiments, I finally came across this method of using the colour replace feature. Not absolutely workable for all images as you will see below but good enough.


The photo was not particularly brilliant but does show the effect. So I tried it out on a couple of other images to make sure I could do it properly.


I liked the example with the fuchsia, it did seem to work quite well. The example with the tulips did show the one issue with this method. I could not change the red foliage in the background. Maybe with a lot of tweaking it would be possible but in trying to select the red foliage the tulips were always partly selected. However to try and make it easy I had selected a high fuzzy value, this decides how broad the range of selected colours will be. So doing it with a low fuzzy value should be the answer. I will experiment and let you know how I get on.

So what did I do?

With the image in the active window, select image / adjustments / replace colour.


I set the Fuzziness as indicated above to about 170.
Select the colour picker, on the left of the 3 dropper icons.
now click on the image to select the colour to replace. If you select the middle icon you can add other colour values near to the initial colour .
Now reduce saturation as much as required, and adjust lightness if required.

Repeat this for any colours you need to desaturate.

You should now have an image with just the colour you wish to preserve in a black and white background.

I love this software I am experimenting and learning all the time. Lots of clever tricks have tutorials written for them but I need to know the simple effects that are possible. Walk before you can run is my motto.

Monday, 16 July 2012

A short holiday in Glastonbury

Just back from a very short break in and around Glastonbury - no festival this year but a lovely place to relax and recuperate.

For my first photo, a shot of one of the yards or alleys off the high street. A number of shops on the left of this image.


My second is a statue of a godess and her hound in the courtyard of the Glastonbury experience.


Both quite standard shots but interesting. My new camera has a 10X zoom and I have been trying this out. This next photo shows a stone carving above the side door of St John The Baptist Church on the high street. We approached the street along a pedestrian alley from where we had parked the car and over the fence was the church. But some distance away. I took some photos of course but set up the camera by holding it on the fence to take some shots with the zoom. Here is one example:-


Not a bad shot, tho' I say so myself. Could probably do with having the contrast improved however.

We also visited a nearby NT property with a garden designed with many small rooms, Lytes-Cary Manor. The rest of the photos were taken in the garden. The first two using the macro function and the last used the zoom again.


All the above images were heavily cropped before being resized for this post. More holiday shots next time.

The case of the disappearing wheelbarrow

Just a quick post, I was getting a few photographs ready for posting and realised that I had an intruder in one of the shots, a wheelbarrow.

Not being able to go back and take another photo, I decided to doctor it in PS. I think I have done a good job, what do you think?


The dish is called Galadriel's Mirror and is in a garden that we visited recently. More info and shots in the next post. But for now .... now you see it, and now you don't. I am learning to use this great editing tool.

BTW for those interested I simply used the CLONE STAMP tool - carefully!